
Lets check how to use Vale to improve our writing!
Vale
Vale offers open source, command line linting for text. It can enforce a specific editorial style guidelines across your content. You can even create your own style or configure and fine-tune another. You can set it up to check Markdown files, AsciiDoc, reStructuredText, HTML, XML and others. Once you have the rules on your machine configured it can also run offline. Last but not least it has many integrations, GitHub Actions among them, which we will later explore and test.
What we will do
We will configure Vale to run both locally and on a GitHub Actions workflow. This will allow us to not forget to fix any issue that it raises. It enables consistent writing across the whole repository. For example, you can do this for enforcing a particular styling in a news website. Potentially use it in a blog site such as the one you read this article on.
What you will end up with
By the end of this guide you will:
- Have Vale linting Markdown locally
- Have a GitHub Actions job configured
- Know how to silence false positives
- Create a custom rule that enforces your own writing style
- Ignore certain rules and customize vocabulary
Installing Vale
- Download the latest Windows zip from Vale releases.
- Extract and add the folder with vale.exe to your PATH (System Properties >
Environment Variables > Path).
- You can do this by having a folder somewhere named “manual_installations” and will fundamentally have all your programs with similar ways of installing in this place.
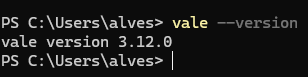
- Verify with
vale --version - After doing that you should have something such as this:
Configuring Vale locally
Now we to check which files need configuring; to do this, use
vale ls-config. This gave an output mentioning the following:
Now lets create the
.valeandstylesfolder and run again and check what we get:
After going over the official docs of vale - .vale.ini - Vale CLI we moved our " styles" folder one level above. Now we have in the root directory of our project.
Additionally, we create a .vale.ini in my root directory as well, to generate it we recommend using - Config Generator
For a sample of how does my
.vale.inilooks like have a look:StylesPath = styles MinAlertLevel = suggestion Vocab = YourVocab Packages = RedHat, proselint, write-good, alex, Joblint, Hugo [*.{md}] # ^ This section applies to only Markdown files. # You can change (or add) file extensions here to apply these settings to # other file types. # For example, to apply these settings to both # Markdown and reStructuredText: # [*.{md,rst}] BasedOnStyles = Vale, RedHat, proselint, write-good, alex, JoblintNow we will run
vale syncthis allows vale to download the needed configuration related with what we just configured in our.vale.inifile, you should see an output such as this:
For running vale in your repository you can use
vale .And that concludes it; Vale runs locally after configuration.
Quick snapshot of how the directory stands at this stage
This will help us gauge our next steps. Lets see how it looks to have everything in place:
project-root/
│
├── .vale.ini
├── styles/
│   ├── RedHat/
│   ├── MyStyle/
│   │   └── Substitutions.yml
├── content/
│   ├── post1.md
│   └── post2.md
└── README.md
Now lets start configuring GitHub Actions.
Configuring Vale in GitHub Actions
On your GitHub workflow file add a new job by using the following code:
vale:
  name: runner / vale
  runs-on: ubuntu-latest
  steps:
    - uses: actions/checkout@v4
    - uses: errata-ai/vale-action@v2.1.1
You will see that now we have a bunch of errors that relate with some of the README files under styles folder. Lets ignore them by changing the command we use locally from
vale .tovale content/andvale README.mdThen for our GitHub Actions workflow lets add the following:
vale:
  name: runner / vale_content
  runs-on: ubuntu-latest
  steps:
    - uses: actions/checkout@v4

    - uses: errata-ai/vale-action@v2.1.1
      with:
        files: '["content/", "README.md"]'
        fail_on_error: true
Adding certain words
Let’s imagine that you have a word that does not qualify as a valid English word. In some cases you will want to accept this and avoid a warning for every occurrence of such word. To do that:
- Ensure you have the following directories created
YOURStylesPath/config/vocabularies/Bloginside this folder you should have 2 filesaccept.txt- for words to allowreject.txt- for words to reject
- You should add one word per line in the corresponding file.
Exclude certain rules from executing
If you want to exclude some rules from executing you can do that as well by doing the following:
- Go to your
.vale.iniand under the filter you want to exclude the rule(for example [*.md]) do:RedHat.GitLinks = NOin this case if wanted to disable the RedHat.GitLinks rule.
Create your own style
Sometimes you might find that you perform always the same action when some error, warning or suggestion gets displayed. For example you change the word " simple" with “basic”. Perhaps you could create your own rule to already tell you to change such word. To do that:
On your
.vale.iniyou will add the name of the style you want to create, for exampleMyStyle:[*.md] BasedOnStyles = Vale, RedHat, proselint, write-good, alex, Joblint, MyStyle RedHat.GitLinks = NOThen you will create under your
StylesPatha folder namedMyStyleinside this folder your will create a file namedSubstitutions.yml. Then you can add your rule such as this:extends: substitution message: "Prefer '%s' over '%s'." level: warning ignorecase: true swap: simple: basicWe have finished. Next time you run
vale .check that the warning shows up.
Bonus
We have created a small tool in Kotlin to help on this. It integrates with Abacus AI(aggregates a bunch of models). Feel free to play around with it if you find it useful. Currently, it functions as a basic script but if the time allows it we will improve a bit the codebase. You can find it here - xalves/abacus-integration
Disclaimer. Referral link ahead. - If you want to help me as well as giving a shot to Abacus AI have a look by using my referral link: Referral Link
Conclusion
Vale brings the rigor of code linting to prose, helping teams enforce a consistent editorial style across docs, READMEs, and knowledge bases without sacrificing privacy or speed. Its markup awareness reduces false positives and with a flexible rule system you can codify your style from terminology and capitalization to tone and spelling. Because it runs locally and integrates with editors and CI, Vale fits naturally into developer workflows and scales from solo projects to large doc sets.